Greetings strangers!
This time I will show you a simple approach to an effect that will help our renderer to have a more “artistic” look: the light shafts, also known as god-rays. Needless to say that the source code + assets are available, at the bottom of this post.
Basics
You can find a good description of the effect here. It’s a more physically based tutorial, so if you have shivers on your spine every time you see an integral symbol, skip it and follow my trail. The effect I implemented can be described as a simple radial blur, using the light position (in screen space) as the center of this effect, and masked by a texture.
The masking is needed to avoid the foreground objects to bleed into the scene, as the light is the only thing that needs to be “shafted”. Keep in mind that this example/tutorial is only valid for directional lights, but it can be easily extended to support point lights.
To find the center of the radial blur, you need to project the light position into screen space. As we are dealing with a directional light, you can just use a simple trick to create a fake light position, using the camera position + light direction*(value between near and far plane). And the hack season has begun!
With this projected value in hand (and in range [-1..1]), we should compute an “intensity” factor. The effect should be at maximum when the user is viewing the light right in front of it, and fade out smoothly as the light moves to the screen border. You can see what I’m doing in the file PostProcessingComponent.cs, method PreRender.
note: last post I talked about a game framework using components, and that’s what I’m using from now on. The rendering code itself is not tied to the game layer, so if you don’t like that, just use the .fx and LightShaftEffect.cs code.
Mask Creation
We need to figure out what will be blurred. We can’t just blur everything, we need to detect what is in the light layer, in our case, the background (remember that I’m dealing only with directional lights in this example). Thankfully, we already have what we need: the depth buffer! Since we are using a LPP approach, we already have it in our G-Buffer, it’s even already downsampled 2x to save some bandwidth. What we need to do is mask out the foreground pixels and voila, it’s done. Actually, I’m using the z value itself, and not just a binary mask. This allows the foreground objects to bleed a little bit, just to give a special taste to it. Check out the file LightShaftEffect.fx, method PixelShaderConvertRGB. Remember folks: this is not a physically based approach!
In the same step where I generate this mask to the Alpha channel of a render target (I’m using a 1/4 sized RT), I downsample the color buffer with a simple linear filtering. This will save some texture bandwidth in the next step.
Blurring
This is the most costly step, but it is as simple as it could be: for each pixel, we sample a lot of texture values in the direction of pixel’s position -> light’s position (in screen space). I’m applying some attenuation based on the distance to the light, and also the distance between each texture fetch is customizable. In fact, there are lots of customizable parameters. Take a look in the shader and also in the level file, coluna_level.xml, where the component containing the post-processing effect is stored along with the default values for its parameters.
I’m doing 40 texture fetches for each pixel, and that is a lot. It’s important to have the blur source (the mask + downsampled RGB) at a small size to avoid texture cache misses. As it’s blurred as hell, you will gonna end up losing the high frequencies anyway.
Final Mix
The output can be done as a single sum of the original source + ( blurred version * blurred version Alpha ). You could use some luminance and threshold formulas, but for the sake of simplicity I’m doing just what I said before.
Bonus: Tone Mapping
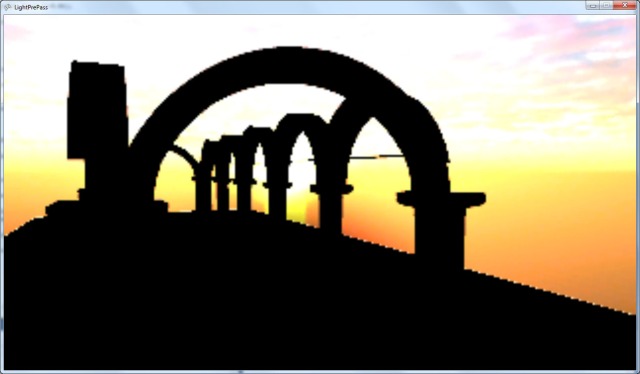
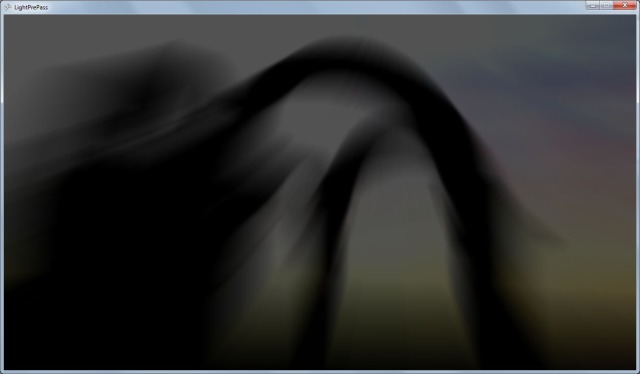
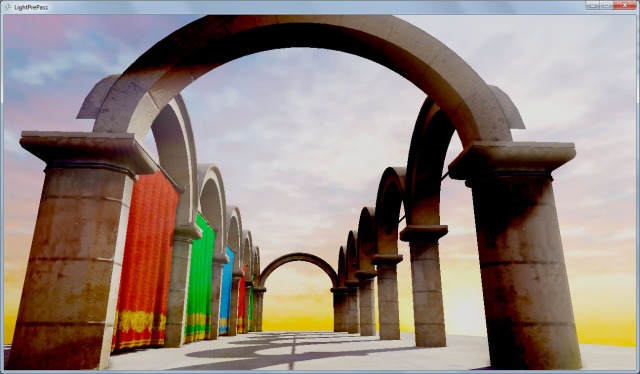
To give an even more sexy look, I added a tone mapping algorithm to the final mix, so you can control how the colors are displayed on screen. You can change the contrast, saturation, exposure and color balance of the scene. Thanks to our LPP renderer, the input source is already in HDR, so we won’t have color banding when doing this color space transformation. The technique I’m using is explained here. Here are some examples of the same view using different tone mapping parameters:
That’s it folks, I hope you enjoyed it. As usual, the source code is here (***my public dropbox folder is down for a while, I will try to move the source files somewhere else. Sorry about that***). Feel free to use it, at your own risk!! Any comments, suggestions and donations are appreciated.
Thanks!
-J.Coluna
Errata: in the previous post, I forgot to add a serializer class, so the loading code was duplicating all the entries instead of sharing them (the SharedResourceList stuffs). It’s fixed now.


OMG there was no work today so i took my laptop back to the shop and when i got home i found this.
Thank you so much!! i can remove my crapy tonmapping now! and the god rays just what i needed.
Ill post some SS of my editor once i get this inigrated(i work in VB10).
ps. my and my GF dig your music! keep it up 🙂
Hey,
So i got the god rays in now and they look sweet ty so much, here is a SS http://img543.imageshack.us/img543/2168/forceedit.jpg
I had a lil trubble getting it up and running as im not using your framework and my world size is much larger than yours.
Just for anyone else giving this ago the 2 parts that i got stuck are(these are both my problem):
PostProcessingComponent.cs
PreRender Sub
pos = GlobalCamera.Transform.Translation – light__1.Transform.Forward * 1000(it was 10)
and in the shader the tonemapping was messing with the look of things so i had to disable it for now.
Anyway thanks again! love your work and be safe!
Hey dude, it seems that your editor has a lot of nice features, I’d love to see it in action =)
The PreRender stuff is there to compute the light position in screen space (it’s a hack, I was just lazy to figure out a good way to project a directional light in SS).
Let me know what trouble you are having with the tonampping, I can help you on that.
See ya!
-J.Coluna
First of all, I just want to say you’ve been posting some pretty amazing code. I’ve looked at a lot of examples for XNA but rarely have them as clean and actually good looking as yours. Hope you keep it up.
Admittadly, I’m not entirely sure about component based frameworks, but that’s just me. It does bring up some questions when trying to figure out how things work. Namely, how are you making your xml file? The first thing I wanted to do was adjust the angle of the directional light in this example, but could only guess which of the figures in the LocalTransform was the appropriate angle. From the previous posts screenshots I take it you’re using an in-house editor.
I take it it’s still possible to make objects / lights at runtime and add them with the AddComponent function? (wasn’t quite sure what it wanted in a “type” argument either. I am not good programmer.)
Also, I flipped a channel in the column normal map because every time I opened an example I kept staring at the column where the light looked like it was coming from below. :p
Drop box link if interested…
http://dl.dropbox.com/u/65996944/sponza_column_a_ddn.tga
Hey chap,
Thanks for your comment, I appreciate that.
About your questions:
– I’m using an in-house editor. As I derived the LPP source code from my engine, I can’t just give you guys the editor code because it will not work (and the editor code is a mess). I think a basic editor would be a good choice for the next post =)
– You can create manually the game objects and components, here is an exampe
// there are 2 ways to create a GO: using a parent and name as arguments (like the way below), or just passing a name as an argument
GameObject go = _gameWorld.CreateGameObject(goParent, “Bla”);
// you can add components using this templated method. It will return the instantiated component
CameraComponent cam = go.AddComponent();
// now you are ready to change the component’s and GO’s properties
cam.FarPlane = 1000;
go.LocalTransform = Matrix.CreateFromYawPitchRoll(0,20,30);
Hope it helps, and thanks for the fixed texture!
-J.Coluna
I vote for the editor post 🙂
Keep up the great articles.
Hey.
i’m was working on light shafts on my code that implemented with openGL 4. i’d like say that
your sample based on gpu gems 3 is very amazing and helpful for me…congratulation dude!
best regards.
Thank you, I’m glad that I’m helping people out there =)
-J.Coluna
carai didi…ta animal a parada ae…SHOW
Valeu Panga, bora fazer alguma coisa nisso =)
J.Coluna
huhuhu..tava esperando tu perguntar….prometo não dá pra trás dessa vez…abç
I stumble onto you posts just by chance… have to say that the text is very light and easy to follow and the code is amazing dude, keep up the good work and keep rocking that music clips
Thanks chap! Good to hear that
-J.Coluna
Hi. Thanks for the excellent job. 🙂
I just wanted to ask how at this point do I render tranparent objects. Does it depend on the alpha channel of the textures?
And can I add costom effects (from effect files) to the objects in my scene just the same way I did with forward rendering?
Sorry for disturbing, but I’m new to programming.
Hey, take a look at the older posts. There is one about transparency and also custom fx (https://jcoluna.wordpress.com/2011/08/18/blending/)
Tks for visiting!
-J.Coluna
Thanks very much.
I’ve understood that post but, is there any way to change the shader effects at runtime?
Thanks again. 🙂
How did you convert this to an an Xbox project?
Don’t worry I figured it out. I needed to create Xbox versions of projects, but still include the windows projects so it can build assets.
Hi, I just launched my XNA engine. It uses some code (lighting and shadowing) from your Light Pre Pass source and modified these parts to fit with my engine. You can visit http://www.nobleygames.com/ to view it. Documentation is still a bit, but I will soon complete one by one. I put your name on the credit. Thanks you very much, your light pre pass is very helpful () 😀
That’s awesome, I just downloaded it and took a look. Impressive, I’m glad you are using some part of my code!!
-J.Coluna
Let me know, if you have problem when installing or running these product. I expect criticism and suggestions from you.
Have you done any experimentation with anti-aliasing. This article describes a post-process effect http://www.gamedev.net/topic/580517-nfaa—a-post-process-anti-aliasing-filter-results-implementation-details/ that I could implement on the PC.
However the Xbox can do hardware anti-aliasing. When I enable multisampling it has no effect.
graphics.PreferMultiSampling = true;
Do you have any ideas or suggestions on how to use multisampling on the Xbox, whilst still using your code?
Many thanks!
Enabling multisampling will not help, because our render targets (the G-Buffer) is not multi-sampled. You can either increase the G-Buffer resolution, or add a post-process effect as you mentioned (if you do it, please send me the code =)
-J.Coluna
Hi!
Can i create meshes from a vertice list?
Hi. Always doing the great job here right? 🙂
I wanted to ask you something about adding an editor. For now I’m just trying to insert the Nature Game Editor to the light pre-pass sample, and I’m almost done with the game framework. 🙂
There’s just one little thing I’m actually missing about it, the way you add new objects in the scene.
I haven’t understood the way you’re doing it by code so could you please give me some clarification about it? Thanks a lot!! 🙂
Another thing: are you really adding an editor as the one you’e implemented in you’re game? That would be awesome!! By the way, I’m looking forward to making a donation!!! 🙂
Hi. Very impressive work on this renderer!
I was wondering if you have heard of the Xen framework (http://xen.codeplex.com/)?
It’s a great framework which improves some parts of XNA which are bad for performance (spritebatch, content loading, input, etc) and adds skeletal animation and particle effects and custom low level shader compiler with hotloading (things game programmers would rather get a library for than code themselves)
Sadly the developer didn’t have time to complete his deferred renderer for Xen, but there are still people who use the framework, myself included, and it’s very simple and useful.
I was wondering if you would be interested in taking a look at it, and maybe integrating your LLP renderer onto the Xen framework? Or atleast make it easy to plug into it. I understand you don’t really want to bind your project to another project, but this project won’t require more updates, and you won’t need to add all of your own systems for particles, animation, shaders, content loading, etc.
What do you think?
If not, could you point me in the right direction of how to integrate your renderer with this framework? Would it be very difficult?
Thanks!
Been trying to integrate this myself. Xen changes the way drawing is handled (along with a lot of other things) by making everything into seperate drawtargets, which are all drawn at the drawing stage. This makes some of the SSAO and PostFX methods a bit difficult to port over since they overwrite their drawtargets multiple times.
Not sure how to handle this. The Xen examples (25 & 28) have multipass drawtargets for shadow mapping, but I’m having trouble understanding completely how to translate your code into the Xen design.
Any help? 🙂
Hi. I would advice you to try starting afresh with the light pre-pass tutorial and then trying to implement the Xen framework. I don’t think it should be too difficult, as someone’s already done something similar (Frostbyte Games).
Hope it helps. Tell me if you find something else. 🙂
Hi, thanks so much for making all your work available for others to learn from & to use! I’ve learned a great deal from your examples.
I wanted to mention though, an exception occurs with all the versions of your examples when using dual monitors and moving from one screen to another. This link shows the exception details : http://pastebin.com/LDKWNFy8
In my own project, I’ve resorted to manually setting sampler states where this happens. Brute-force setting of all sampler states works well enough but ideally the code would know the register index & set the ones actually in use.
Thanks again, looking forward to more great things from you!
I meant to say, all the examples I tried – the latest one and the instancing one from the beginning of the year.
Hey buddy, tks for downloading and running my samples! I will try to fix that issue, I don’t have two monitors though. I’m writting a new post right now, stay tuned!
-J.Coluna
to nobley :
Any chance to get some source code or materials source from you engine?
Hi , thanks for the sample. It helped me a lot. And for the sun position in screen space I have a better idea :
Matrix infView = Camera.View;
infView.translation = Vector3.zero; // Sun is in infinite
Viewport viewport = GraphicsDevice.viewport;
Vector3 SunPos = viewport.Project(-LightDirection,infView , Camera.projection,Matrix.identity);
SunPos.x = 2.0f * (SunPos.x/Camera.Width) – 1.0f;
SunPos.y = -(2.0f * (SunPos.y/Camera.Height) – 1.0f);
So this Pseudo code gives us the sun position in [-1,1] range . if u need it in texture coordinate u know how to convert it.
And if it is possible please give us a simple sample for coding editor. I have no idea where to start for it , thanks.